If your current AC is limping through another Ohio summer, installation day can feel like a big unknown. A good guide to AC installation process should do one thing well – show you what actually happens, what can change the price, and how to avoid surprises once the crew arrives.
Most homeowners only replace an air conditioner a handful of times, so it is easy to assume the job is just swapping one box for another. It rarely works that way. The best results come from matching the system to the home, checking the ductwork, and making sure every part of the setup is built for reliable performance instead of just quick installation.
What the guide to AC installation process should cover first
Before any equipment is ordered, the first step is evaluating the home. That means more than looking at the brand name on the existing unit. A qualified technician should consider square footage, insulation, window exposure, ceiling height, duct condition, and how well the old system actually cooled the house.
This matters because bigger is not always better. An oversized unit may cool the house fast, but it can short cycle, leave humidity behind, and wear out sooner. An undersized unit will run too long and struggle on the hottest days. Proper sizing is where a lot of long-term comfort problems either get prevented or baked into the job from day one.
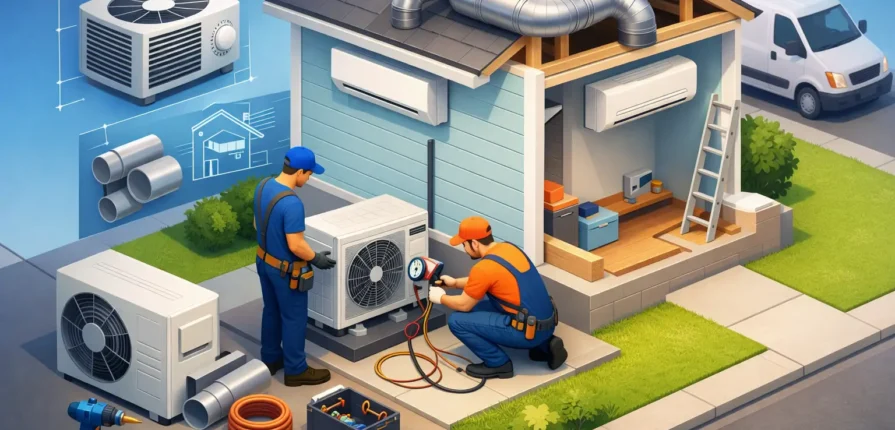
If the system includes both indoor and outdoor components, they need to be matched correctly. The condenser, evaporator coil, and sometimes the furnace or air handler all work together. Mixing the wrong pieces can reduce efficiency and create performance issues that no thermostat setting will fix.
Choosing the right system for the house
Once the home has been evaluated, the next step is choosing equipment. For most homes, that means deciding between a standard central AC replacement, a heat pump, or in some cases a ductless setup for specific areas.
A straight AC system can make sense if the home already has a furnace in good shape and you want the most familiar replacement option. A heat pump can be a smart move if you want both heating and cooling efficiency, especially during milder weather. Ductless systems are useful for additions, bonus rooms, or spaces where ductwork is limited, but they are not always the best fit for a whole-home replacement.
Efficiency ratings matter, but they should be looked at realistically. Higher SEER equipment can lower energy use, but the return depends on how long you plan to stay in the home, local utility costs, and whether the rest of the system supports that efficiency. Spending more on premium equipment without fixing airflow problems is usually money in the wrong place.
What happens before installation day
A professional installation usually includes some prep before the crew ever unloads tools. Permits may be required depending on the project. Equipment should be ordered and confirmed. The contractor should also review whether any upgrades are needed for the line set, pad, disconnect, drain, thermostat, or electrical connections.
This is also the stage where hidden issues often come up. A rusted evaporator coil cabinet, damaged drain pan, weak return airflow, or undersized electrical service can change the scope of the job. That does not mean anyone is upselling you. Sometimes the old system kept running in spite of a problem that has to be corrected when the new equipment goes in.
Good communication here makes a difference. Homeowners should know what is included, what may become necessary once the old equipment is removed, and how long the project is expected to take.
The AC installation process on install day
On installation day, the crew typically starts by protecting floors and work areas, then shutting down power to the existing system. The old outdoor condenser is disconnected and removed. Inside, the evaporator coil and in some cases the furnace or air handler may also be replaced.
If the refrigerant line set is in good condition and compatible with the new system, it may be reused after proper cleaning and testing. In other cases, replacement is the better move. This depends on age, size, contamination risk, and manufacturer requirements. Reusing a bad line set to save time can create problems that show up later as poor cooling or compressor damage.
The new outdoor unit is then set in place on a level pad. Inside, the coil or air handler is installed and connected to the duct system. Drain lines are routed and checked so condensation moves out correctly. Electrical connections are completed, and the thermostat is installed or updated if needed.
Then comes one of the most important parts of the job: refrigerant charging, airflow setup, and system testing. This is where experience shows. A unit is not properly installed just because it turns on. Pressures, temperatures, airflow, voltage, and controls all need to be checked so the system operates the way it was designed to.
Ductwork, airflow, and other details that affect performance
A lot of comfort complaints after a new install trace back to airflow, not the equipment itself. If the ductwork leaks, returns are undersized, or supply runs are poorly balanced, even a high-efficiency system can leave some rooms too warm and others too cold.
That is why duct inspection matters during the installation process. Some homes need only minor sealing or adjustments. Others benefit from larger return ducts, added supply runs, or better filtration setup. It depends on the layout of the home and the condition of the existing system.
Airflow also affects efficiency and equipment life. Too little airflow can freeze the coil and strain the system. Too much can reduce dehumidification and make the home feel clammy. Proper setup is not guesswork.
How long AC installation usually takes
For a straightforward replacement, many installations can be completed in one day. If the project includes new ductwork, major electrical updates, furnace replacement, or problem-solving in a tight attic or crawl space, it can take longer.
The timeline also depends on access. A unit tucked behind landscaping, an attic with limited clearance, or an older home with space limitations can slow things down. That is normal. Rushing an installation to beat the clock usually leads to shortcuts that cost more later.
What affects the final cost
Homeowners usually want a simple number, but AC installation pricing depends on several moving parts. Equipment size and efficiency are the obvious factors, but not the only ones. Indoor coil compatibility, thermostat upgrades, line set replacement, duct modifications, electrical work, condensate drainage, and code updates all affect cost.
Brand matters some, but installation quality matters more. A lower-priced system that is poorly sized or installed can be a bad value fast. On the other hand, the most expensive equipment is not automatically the right answer if your home does not need the added features.
Flat-rate pricing helps because it gives homeowners a clearer picture of what is included. That is especially useful when comparing quotes. If one estimate is much lower than the others, it is worth asking what has been left out.
Questions worth asking before you approve the job
A few direct questions can tell you a lot about the contractor. Ask how the system was sized. Ask whether the existing ductwork has been inspected. Ask what parts are being replaced beyond the outdoor unit. Ask how startup and testing will be handled. And ask what warranty applies to both the equipment and the labor.
If a quote comes together too fast with no discussion of airflow, indoor components, or electrical needs, that is a warning sign. A real installation plan should account for the whole system, not just the box outside.
After the install: what to expect next
Once the system is running, the technician should walk you through thermostat operation, filter changes, and any maintenance recommendations. You should also know what normal startup sounds like, how long cooling cycles may run in high heat, and when to call for service.
The first few days are a good time to pay attention to comfort across the house. If one room is staying warm, airflow feels weak, or the system is not removing humidity well, speak up early. Small adjustments after installation can make a big difference.
Routine maintenance matters too. Even a new system needs coil cleaning, refrigerant checks when needed, electrical inspection, and filter changes to stay efficient. Companies like Professional Trade Service often see preventable breakdowns that start with neglected maintenance, not faulty equipment.
A new AC system should make your house feel better, not give you a new set of headaches. If the installation is handled carefully, sized correctly, and tested the right way, you get more than cold air – you get a system you can count on when the weather gets serious.
Recent Comments